backgrnd

Mar 31, 2011

Shredded Pork Tostados

I stinkin love Mexican food. I think it might be because I was raised on it, or maybe it was because it was the last thing that my Mom ate before she birthed me.  Regardless I LOVE IT! I made this dish from a pork shoulder that I slow cooked and made hawaiian bbq pork out of the first night and then soaked in orange juice and chipolte peppers the second day.  It was delicious.  The tangy orange juice was a nice partner to the spicy chipolte and then I topped it with finely chopped onion, chopped cilantro and avocado, queso fresco and a ton of lime. So really no recipe, except for the pork shoulder:

Kalua Pork
delightfully borrowed from melskitchencafe
10-12 pounds pork shoulder butt roast (don’t substitute a leaner cut of pork or it will be dry)
1 bottle liquid smoke
2 tablespoons sea salt (or hula salt if you can find it)
1 1/2 cups water
Preheat oven to 375 degrees.
Trim roast of large pockets of fat (but leave some fat on there to help the pork stay tender while cooking). Place pork in large roasting pan (the aluminum, deep roasting pans you can buy at the grocery store work great if you don’t own a heavy-duty roasting pan). Rub 2-3 tablespoons of sea salt into pork. Pour the bottle of liquid smoke over and around the pork. Pour the water around the pork. Cover roasting pan TIGHTLY with two layers of aluminum foil.
Bake for 5-7 hours

Mar 29, 2011

Ahhh Summmmmer (March Dessert Wars Challenge)

I personally think that March in the Pac Northwest is hell.  It's cold.  It's rainy.  Sometimes it snows.  It is particularly difficult for me when I see pictures of all my friends in Texas. It seems like as soon as February rolls around everyone is posting pictures of beach time, gardens and talking about how they are getting sunburns. Things I can only dream about. 
This cake is the result of my frustrations and while it didn't make it any warmer or even make the sun come out it was wonderful and tasted like my favorite Summer drink a mojito!


This is my submission for the March edition of Dessert Wars, which had a great twist to it.  We were given two columns of ingredients to choose from, one traditional and one not so much.  I choose to include avocado from the "not so much" column and lime and mint from the traditional.


Mojito Pound Cake
recipe modified from joythebaker
3 cups all-purpose flour
1/2 cup yellow cornmeal
1/2 teaspoon salt
1 teaspoon baking powder
1 teaspoon baking soda
3/4 cup unsalted butter, softened
3 cups sugar
4 large eggs
2 teaspoons pure vanilla extract
1/2 cup buttermilk
1/4 cup rum
flesh of 1 1/2 ripe avocados, just over a cup of avocado, mashed

Preheat oven to 350 degrees F. Grease and flour a bundt pant.
In a medium sized bowl, sift together flour, cornmeal, salt, baking powder and baking soda. Set aside. Set the four eggs out on the counter to come to room temperature while you beat the butter and sugar.
In the bowl of a stand mixer, beat butter on medium speed until softened and pliable. Add the sugar and beat until light and fluffy, about 4 minutes. Add the avocado and beat another minute to incorporate. Scrape down the sides of the bowl to ensure that everything is thoroughly mixed.
Add the eggs one at a time, beating 1 minute after the addition of each egg. Beat in vanilla extract.
Reduce the mixer speed to low and add half of the flour mixture, all of the buttermilk, and then the rest of the flour mixture. Beat just until combined.
Divide the dough between the two loaf pans and place in the oven. Turn the oven down to 325 degrees F. Bake for 40-45 minutes or until a skewer inserted in the center of the cakes comes out clean. I checked my cakes every ten minutes or so after the 30 minute mark. Let cool in the pan for 10 minutes, then invert onto a cooling rack to cool completely.

Lime Glaze
3 1/4 cups confectioners sugar
8 tablespoons fresh lime juice plus 2 1/2 teaspoons freshly grated lime zest (about 6 limes total)
Sift confectioners' sugar into a medium bowl. Add lime juice; stir until smooth. Stir in lime zest. Use glaze immediately.

Candied Mint Leaves
Mint leaves
egg white
granulated sugar
1 tsp. water
Gently wash flowers and leaves in cool water and blot dry on paper towels.
mix the water with egg white and beat slightly.Carefully dip mint into egg white. Gently dredge with sugar and dry on waxed paper 12 hours or more before using.


March's prize package includes:
Whisk and cupcake necklace from Moon & Star Designs
The Smartshopper Electronic Grocery List Organizer
http://www.beanilla.com/variety-sampler-bean-p-137.html
Lenox Personalized Musical Cupcake
1,000 ideas for Decorating Cupcakes, Cookies & Cakes
Endless Vanilla and Cinnamon Extract
Unlimited Layers: A Recipe for Turning Your Passion into Profits
50 $ Gift certificate to organic valley
Organic Prairie $50 Gift Certificate
Theme Kitchen $50 Gift Certificate
Crepe Pan

Mar 21, 2011

Spicy Grits Bowls

     "I like my grits gritty."  I don't really know why but I growled this at SA yesterday before preparing this new delightful dish to add to my repertoire, but it started an epiphany. 
     Do you ever just look in your fridge and feel slightly uninspired by the ingredients you have before making a trip to the grocery store? I do it ALL the time, and I am the queen of the last minute call to pick up ingredients on the way home. I am however, trying to turn over a new leaf and use my pantry so this recipe is a result of trying to be both frugal and use ingredients I had on hand (and almost always have on hand.)


Spicy Grit Bowls
Two servings of grits prepared
2 cups of black beans
1/2 pound of spicy sausage cooked and crumbled
1/4 c. grated cheddar cheese
1/4 c. green salsa
1 avocado chopped
sour cream
cilantro to taste
      So basically layer the the toppings on top of the prepared grits and then mix them up if you want  to or not :) Delicious and feeds two.

Mar 19, 2011

Pappas Rellenas and Sopa de Lima (March Daring Cooks Challenge)

I was on a mission as soon as I read the recipe for the March Daring Cooks challenge.  I was going to find some Purple Peruvian potatoes! Alas I went to every grocery store in the area to no avail.  Finally I went to Seattle for work and got a chance to visit the Pikes Place Market (WHICH I LOVED!!!) In the market I barely had to look, there were my little purple gems. 
Due to being sick with what I am going to refer to as the plague for the last week I just got a chance to perform the challenge tonight for SA and our friends Tiff and Matt. It was fantastic! I used a mixture of spicy sausage, onions,garlic, olives and cheese.


Pappas Rellenas
For the dough:
2¼ lb (1 kg) russet potatoes
1 large egg
For the filling:
2 tablespoon (30 ml) of a light flavored oil
½ lb spicy sausage
6 black olives, pitted and chopped (use more if you love olives)
2 hard boiled large eggs, chopped
1 small onion, finely diced (about 1 cup (240 ml))
1 finely diced aji pepper (ok to sub jalapeño or other pepper – if you are shy about heat, use less)
2 cloves garlic, minced or passed through a press (if you love garlic, add more) 1 teaspoon (5 ml) (4 gm) (1/8 oz) ground cumin (use more if you like cumin)
½ teaspoon (2.5 ml) (2 gm) (1/16 oz) sweet paprika
Salt and pepper to taste
For the final preparation:
1 large egg, beaten
1 cup (240 ml) (140 gm) (5 oz) all-purpose flour
Dash cayenne pepper
Dash salt
1 cup dry (240 ml) (110 gm) (4 oz) or fresh (240 ml) (60 gm) (2 oz) bread crumbs (you can use regular, panko, make your own or use store-bought)
Oil for frying (enough for 2” (50 mm) in a heavy pan like a medium sized dutch oven)
Directions:
In order to save time, you can boil the potatoes, and while they are cooling, you can make the filling. While that is cooling, you can make the potato “dough.” In this way, little time is spent waiting for anything to cool.
For the dough:
Boil the potatoes until they pierce easily with a fork. Remove them from the water and cool.
Once the potatoes have cooled, peel them and mash them with a potato masher or force them through a potato ricer (preferred).
Add egg, salt and pepper and knead “dough” thoroughly to ensure that ingredients are well combined and uniformly distributed.
Forming and frying the papas:
Use three small bowls to prepare the papas. In one, combine flour, cayenne and salt. In the second, a beaten egg with a tiny bit of water. Put bread crumbs in the third
Flour your hands and scoop up 1/6 of the total dough to make a round pancake with your hands. Make a slight indentation in the middle for the filling.
Spoon a generous amount of filling into the center and then roll the potato closed, forming a smooth, potato-shaped casing around the filling. Repeat with all dough (you should have about 6 papas).
Heat 1 ½ - 2 inches (4 – 5 cm) of oil in a pan to about 350 – 375° F (175 - 190°C).
Dip each papa in the three bowls to coat: first roll in flour, then dip in egg, then roll in bread crumbs.
Fry the papas (in batches if necessary) about 2-3 minutes until golden brown. Flip once in the middle of frying to brown both sides.
Drain on paper towel and store in a 200ºF (95ºC) (gas mark ¼) oven if frying in batches.
Serve with salsa criolla (or other sauce of preference) immediately.


I served the Pappas Rellenas with Sopa de Lima:


Sopa de Lima (Tortilla Soup with Lime)
delightfully borrowed from Home Sick Texan
1 medium yellow onion, quartered
10 cloves garlic
2 quarts of chicken broth
1/4 teaspoon ground allspice
1/4 teaspoon ground cinnamon
1/2 teaspoon oregano
1/4 teaspoon ground cumin
Pinch of cayenne
1 cup chopped cilantro, divided
2 teaspoons lime zest
2 cups shredded cooked chicken
Salt and black pepper to taste
1/4 cup lime juice
1/2 cup shredded Monterrey Jack cheese (4 ounces)
Crushed tortilla chips
2 jalapeños, stems and seeds removed, diced
1 avocado, pitted and peeled, cubed
1 lime, cut into slices

Place the quartered onion and 10 cloves of garlic under the broiler. Cook until blackened, about 10 minutes, turning once. Place the cooked onion and garlic into the blender, along with 1 cup of the broth. Pour into a large pot.
Add the rest of the chicken broth to the pot, and stir in the allspice, cinnamon, oregano, cumin, cayenne, 1/2 cup of the chopped cilantro and lime zest. Bring to a boil and then turn down the heat and simmer uncovered for 10 minutes. Add the shredded chicken and cook for 5 more minutes. Taste and add salt and black pepper to taste. Adjust seasonings, and then stir in the lime juice.
Serve with Monterrey Jack, crushed tortilla chips, diced jalapeños, remaining 1/2 cup of chopped cilantro, avocado and lime slices.
Blog Checking Lines:
Kathlyn of Bake Like a Ninja was our Daring Cooks’ March 2011 hostess. Kathlyn challenges us to make two classic Peruvian dishes: Ceviche de Pescado from “Peruvian Cooking – Basic Recipes” by Annik Franco Barreau. And Papas Rellenas adapted from a home recipe by Kathlyn’s Spanish teacher, Mayra.

tortillasoupchallengegirlichef

Mar 17, 2011

For Japan with Love

When I was a kid growing up on the Texas gulf coast, I remember when hurricane Alicia hit.  It wasn't one of the epically destructive hurricanes of years past(ie. Katrina or Ike), however it was memorable to me.  I remember how the trees were destroyed and the power was out for days and the surreal quality to the fact that we were using water from the tub that my dad had filled up before we evacuated to do everything from wash our hands to flush the toilet. The neighborhood fared well but I remember the houses out where my grandparents lived, torn from their stilts or simply a blank spot where a house used to be.  I remember not being able to know if our friends and family were OK and the tree that crushed our neighbors mustang.  I even remember dropping a full container of melted bluebell chocolate ice cream on the floor... a true travesty considering we were without power or water for days! When I look at the pictures of the destruction in Japan I think of my hurricane experience times 20. In light of what occurred in Japan I am reminded:

In Lak'ech
I am you, and you are me---
and we must all
COME TOGETHER!

I will be silent this Friday in support of this movement.  Please take a moment and check out the above link or more directly here to make a donation to shelterbox which is an awesome organization that does great work!
Sending LOVE from the heart to the people of Japan.

Mar 4, 2011

Lentil Soup with Preserved Lemons

Recently we had a snow day.  And by snow, I mean, that it snowed a bit and covered all of the trees in a beautiful white glaze.  SA and I managed to have the same day off that day so we decided to take a drive up into the mountains. It was gorgeous:
We stopped by a local lake and I got accosted by a goose? The question mark was because I think it was a goose.  I have never heard something make a sound like this one was making.  I think it wanted part of my Luna bar... at any rate, it made Curry loose his mind!!!
look at that evil glint in his beady eyes! He was out to get me!!!!

see? Curry was loosing his mind over the snowdrifts.  This picture we like to affectionately call, digging to china, because that's what he was doing in the big pile of snow!!!
 At any rate, after we got home we were hungry for something warm in our belly's and soup fit the bill quite nicely.  This lentil soup is delicious, but the addition of the preserved lemons on the top took it to the next level.  I started the preserved lemons from a recipe on chow back in December and they were the perfect accoutrement, and highly delicious in their own right.


Lentil Soup with Spiced Preserved Lemons
polska kielbasa cut into chunks
1 onion, chopped
1/4 cup olive oil
2 carrots, diced
3 cloves garlic, minced
1 14.5 ounce can crushed tomatoes with chiles
2 cups dry lentils
6 cups of chicken broth
2 cups spinach, rinsed and thinly sliced
salt to taste
ground black pepper to taste

In a large soup pot, heat oil over medium heat. Add onions and carrots, and sausage and cook and stir until onion is tender. Stir in garlic oregano cook for 2 minutes.

Stir in lentils, and add chicken broth and tomatoes. Bring to a boil. Reduce heat, and simmer for at least 1 hour. When ready to serve stir in spinach, and cook until it wilts and season to taste with salt and pepper.
Top with rinsed chopped spiced preserved lemons.

Feb 28, 2011

Dark Chocolate Meringue Hearts with Caramelized bananas, Marshmallow fluff and Peanut Brittle

"Don't be a stingy little mama
You're 'bout to starve me half to death
Well you can spare a kiss or two and
Still have plenty left..."
  I've had Elvis in my head for the last four days. Its true.  Ive been annoying everyone including myself with my incessant singing of a Big Hunk of Love.  To make matters worse, I have never been an Elvis fan per Se.(My general dislike might stem from the fact that my the only time I was ever in Memphis I couldn't afford to visit Graceland...) Regardless, the king was on my mind when I was thinking about what I would make for this months Dessert Wars Challenge.  Last month I really brought it with my challenge so I knew this month I needed to come up with something to top homemade Nutella.  I brainstormed all month practically and even made a dessert that while was delicious was about as unappealing as well.. a big hunk of love. (BTW, screw you heart inside cupcakes, screw you!). What I came up with was a mouth full of...love. I might even say it got me all shook up.  If I was going to go farther I would say it had me throwing on my blue suede shoes and walking my hound dog and dancing to the jail house rock. (Did you have any doubt I was going to go farther?)
Without further adieu:

 
Dark Chocolate Meringue Hearts
6 egg whites, room temperature
1/4 teaspoon cream of tartar
3/4 cup granulated sugar
1/4 cup dark cocoa powder
Preheat oven to 275 degrees. Line baking sheet with parchment paper. Place the egg whites in the cleaned bowl, beat at high speed until stiff. This process with take almost 8 minutes. Add cream of tartar and continue to beat. Slowly add the sugar. Remove the beaters and fold in the cocoa powder using a rubber spatula.
Using a piping bag pipe hearts onto the lined tray. Bake on the middle shelf for one hour and then turn off the oven and DON'T open the door for an hour! (DON'T DO IT, even though I know you want to!)
Did you really think I would stop there?


     Dark Chocolate Meringue Hearts with Caramelized Vanilla Bananas, marshmallow fluff , Dark chocolate syrup and Peanut brittle also known as " the Elvis."
     Each bite of this was a little bit of heaven. Seriously. The meringue and the brittle added a bit of crunch to break up the sweet soft texture of the bananas and the fluff and each bite honestly seemed to melt on our mouth.
Caramelized Vanilla Bananas
3 tablespoons sweet unsalted butter
2 bananas, peeled and cut into 1-inch pieces
1/4 cup light brown sugar
1 tablespoon of vanilla
1/2 cup light rum
Melt butter in a skillet over medium heat. Add bananas and saute until they turn brown, about 3 minutes. Sprinkle brown sugar and vanilla over the bananas and cook until the sugar melts, about another 3 minutes. Remove from heat and pour rum into skillet; ignite with a match and let the flames die out pour into meringues and top with a bit of marshmallow fluff, dark chocolate sauce and homemade peanut brittle.
     Thanks again to the wonderful hosts Reeni and Momma Cupcake!
Please see below for the wonderful list of prizes!
p.s. Do you think next month we could have a challenge of something that isn't brown? Taking pictures of brown things sucks my will to live!!!!

The February prize package includes:

Whisk and cupcake necklace from Moon & Star Designs
The Smartshopper Electronic Grocery List Organizer
Beanilla Sampler Pack of Vanilla Beans
Lenox Personalized Musical Cupcake
1,000 ideas for Decorating Cupcakes, Cookies & Cakes
Endless Vanilla and Cinnamon Extract
Unlimited Layers: A Recipe for Turning Your Passion into Profits
Organic Valley $50 Gift Certificate
Organic Prairie $50 Gift Certificate
Theme Kitchen $50 Gift Certificate
BEKA Cookware Crepe Pan


Dessert Wars


Feb 27, 2011

Daring Bakers Challenge: Panna Cotta and Florentines

First and foremost I LOVED THIS CHALLENGE! It was so fun and inspirational.  The hardest part of this challenge was deciding what flavors and combinations to make!
Originally I wanted to make SA the panna cotta and Florentines for Valentine's day, but life got in the way and I ended up procrastinating on the panna cotta.
The first Florentines I made I ended up opting to skip the chocolate and instead used melted cinnamon chips between the two cookies.  AMAZINGLY good.  Buttery, cinnamony and crunchy, some of my favorite traits in a dessert.
Cinnamon Florentines
2/3 cup (160 ml) (150 gm) (5.3 oz) unsalted butter
2 cups (480 ml) (160 gm) (5 2/3 oz) quick oats
1 cup (240 ml) (230 gm) (8 oz) granulated sugar
2/3 cup (160 ml) (95 gm) (3⅓ oz) plain (all purpose) flour
1/4 cup (60 ml) dark corn syrup
1/4 cup (60 ml) whole milk
1 tsp (5 ml) vanilla extract
pinch of salt
1½ cups (360 ml) (250 gm) (9 oz) cinnamon chips
Preheat oven to moderately hot 375°F (190°C) (gas mark 5). Prepare your baking sheet with silpat or parchment paper. Melt butter in a medium saucepan, then remove from the heat. To the melted butter add oats, sugar, flour, corn syrup, milk, vanilla, and salt. Mix well. Drop a tablespoon full, three inches (75 mm) apart, onto your prepared baking sheet. Flatten slightly with the back of your tablespoon, or use a spatula. Bake in preheated oven for 6-8 minutes, until cookies are golden brown. Cool completely on the baking sheets. While the cookies are cooling melt your cinnamon chips until smooth either in the microwave (1 1/2 minutes), or stove top (in a double boiler, or a bowl that fits atop a saucepan filled with a bit of water, being sure the water doesn't touch the bottom of the bowl). Peel the cookies from the silpat or parchment and place face down on a wire rack set over a sheet of wax/parchment paper (to keep counters clean). Spread a tablespoon of cinnamon on the bottom/flat side of your cookie, sandwiching another (flat end) cookie atop the cinnamon.

Then we had a little dinner get together.  It was completely on the fly and I just served soup so I decided to really impress with the dessert.  It was time to bust out the panna cotta.
I ended up making a coffee scented cinnamon panna cotta with dulce de leche and white chocolate Florentines.  I wanted them to taste like caramel macchiatos.  I think I succeeded and they were well received by the friends we had over.


Coffee scented Cinnamon Panna Cotta
1 cup whole milk
1 tablespoon (one packet)  unflavored powdered gelatin
3 cups whipping cream
2 tablespoon granulated sugar
pinch of salt
1 teaspoon of cinnamon
8 coffee beans or 1 tsp. instant coffee granules

Pour the milk into a bowl or pot and sprinkle gelatin evenly and thinly over the milk (make sure the bowl/pot is cold by placing the bowl/pot in the refrigerator for a few minutes before you start making the Panna Cotta). Let stand for 5 minutes to soften the gelatin.
Pour the milk and coffee beans or granules into the saucepan/pot and place over medium heat on the stove. Heat this mixture until it is hot, but not boiling, about five minutes.
Next, add the cream,cinnamon, sugar, and pinch of salt. Making sure the mixture doesn't boil, continue to heat and stir occasionally until the sugar and honey have dissolved 5-7 minutes.
Remove from heat, allow it to sit for a few minutes to cool slightly. Then pour into the glass or ramekin.
Refrigerate at least 6 hours or overnight. Add garnishes and serve.
For the panna cotta I simply layered it with a layer of dulce de leche at the bottom, panna cotta and then more dulce de leche on top. For homemade dulce de leche please use this recipe.


Blog-checking lines: The February 2011 Daring Bakers’ challenge was hosted by Mallory from A Sofa in the Kitchen. She chose to challenge everyone to make Panna Cotta from a Giada De Laurentiis recipe and Nestle Florentine Cookies.

Feb 23, 2011

Pecan Pie Muffins

SA and I are trying to cut back on our spending so of course one of the first places to feel the crunch is our grocery budget. Grant it we live like two foodies who have no kids.  That being said, its probably a good place to cut back a smidgen.  I was a good girl.  I went to the store the other day and only spent $50.62 on seven days worth of food for us.  What does that mean? Well for one, less meat. (Not a bad thing!) and for two less of a budget for snack type things.  So far this has been fine and I have just made homemade hummus and carrot sticks, but tonight the sweet attack came over me.  Some days you just need that little sweet bite.  SA could go forever without anything except for ice cream but I love decadent tooth achingly sweet treats and one of my favorites is pecan pie.  Tonight, however, SA and I were on snow watch 2011 and indulging in a do nothing night watching Serenity and nerding out at its space opera wonderfulness and I had no time for what I was craving: Pecan Pie.
A quick google had me making these delightful gems and then reveling in both their simplicity and DELICIOUSNESS. Omg. I never thought a muffin could taste like a pie.  It's like two wonderful things rolled into one!
and as a side note:  These muffins taste even better while watching Serenity/Firefly.


Pecan Pie Muffins
delightfully borrowed and modified from food.com
1 cup chopped pecans
1cup packed brown sugar
1/2 cup flour
2 eggs
1 tsp. vanilla
2/3 cup melted butter

Preheat oven to 350. Combine all ingredients and mix well.  Pour into paper lined muffin tins and cook for approximately 15 minutes.


Feb 21, 2011

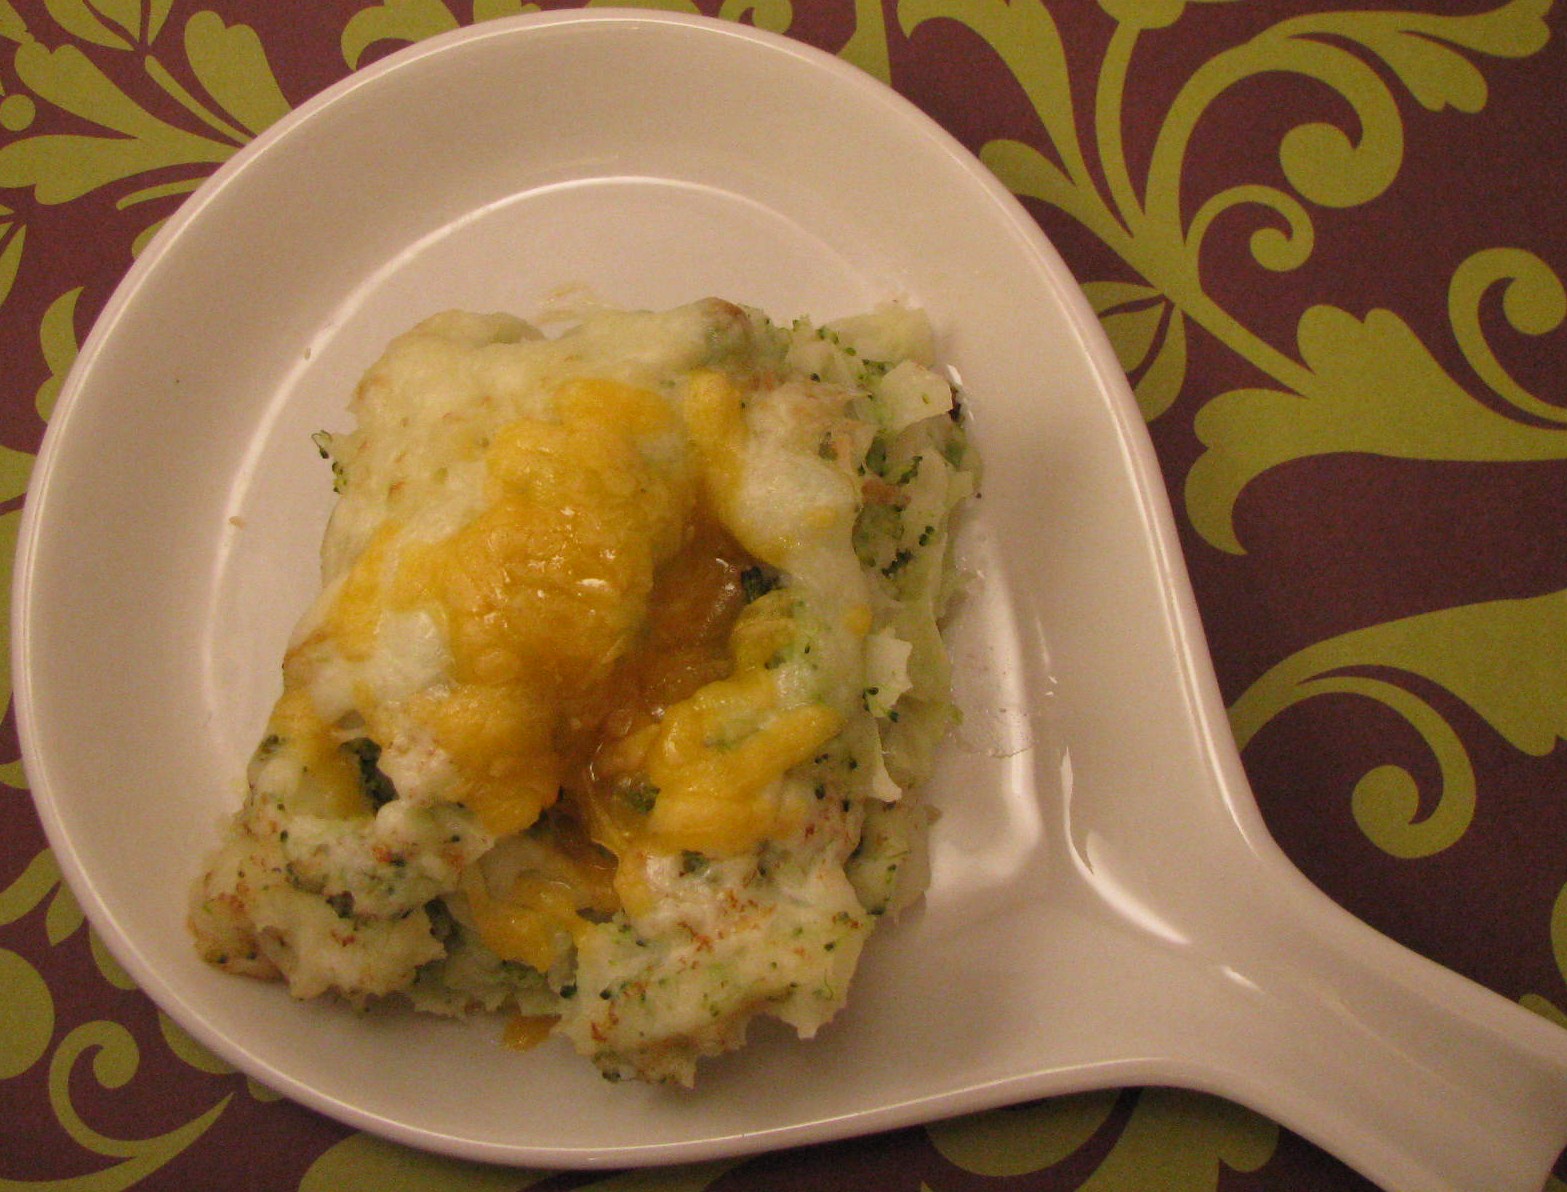
Moosewood Mondays---Rumpledethumps

I'm usually not really into the themed blogging days, but when I saw that Living in the Kitchen with Puppies  was doing a Moosewood Monday's day I was all for it.  I have loved the Moosewood books since I was a kid.  I would look through my Mom's reading the recipes (or just looking at the pictures when I was young!) and plan entire menus from the books my Mom had.  Now that I have my own Moosewood collection I still love to pull out recipes and make  incredibly delicious dishes from them.  Admittedly my favorite is apple crisp that you use orange juice in!
Tonight I wanted to keep our dinner quick, stocked full of veggies and...quick! I have been meaning to try this and I wasn't disappointed with it. SA left a sad little pile of cabbage on his plate and choose that moment to let me know he doesn't like steamed cabbage (too bad!) Funny name, but serious dinner! (forgive the picture, I know its not the best, but I was hungry!)

Rumpledethumps


5 large potatoes (2-2 ½ pounds)
2 1/2 cups chopped cabbage
2 leeks, washed and chopped  * I omitted them :(
21/2 cups coarsely chopped broccoli
6 tablespoons butter
1/4 teaspoon mace
salt and freshly ground black pepper to taste
1/4 cup milk
1½ cups grated cheddar cheese


Peel the potatoes, cut them into chunks, and boil them in salted water for 15 minutes. Meanwhile, steam the cabbage, leeks, and broccoli. Melt 2 tablespoons of the butter and stir in the mace. Mix this seasoned butter and salt and pepper to taste into the steamed vegetables.
Drain the potatoes and mash with 2 more tablespoons butter, the milk, and salt and pepper to taste. Stir in the seasoned vegetables and mix evenly. Spread in an oiled 13x9-inch baking pan. Melt the remaining 2 tablespoons of butter and drizzle it over the potato mixture. Sprinkle the top with the grated cheese. Place under the broiler for 3 to 4 minutes or until the cheese is browned and bubbly.


MoosewoodMondays

Feb 20, 2011

Garlic-Cheese Crusted Chicken and Savory Garlic Cream Pasta

Sometimes chicken is well... boring.  I mean don't get me wrong you can dress it up about a million different ways and parade it around but still it kind of bores me. This recipe however was anything but boring and stemmed from the fact that I saw asparagus in the store again. Oh and the fact that I went to look at fresh pasta in the cheese section (does that make sense?) and saw a new product from Philadelphia Cream Cheese that I really wanted to try.  Normally I'm not into fast fixes or shortcut kind of ingredients, but I do love me some cream cheese and I figured it would hurt to give it a try.  The end result was delicious and a recipe I will be going back to many, many times, I am sure!


Garlic-Cheese Crusted Chicken and Savory Garlic Cream with asparagus, tomatoes and basil pasta
1/3 cup melted butter

2 Tablespoons minced garlic
3/4 cup panko
1/2 cup shredded cheddar cheese
1/4 cup Parmesan cheese
1/4 teaspoon pepper
4 boneless skinless chicken breasts
    
     Preheat oven to 350. Spray a 9 x 13 pan with cooking spray. Combine melted butter with garlic and in another bowl combine panko with 1/2 cup shredded cheddar, Parmesan cheese and black pepper.  Dip chicken in butter mixture and then in crumb mixture. Place in prepared baking dish and bake uncovered for 35-40 minutes.

Savory Garlic Cream with asparagus, tomatoes and basil pasta

2 tablespoons of butter
1/2 a pound of fresh asparagus cut into 1 inch chunks
1 tomato diced
1clove of garlic diced
1/2 onion diced finely
1 container of Philadelphia Cooking Creme Savory Garlic flavor
Cooked Pasta (reserve about 1/2 cup of cooking water)
shredded basil

In a skillet over medium high heat melt butter and saute onion and garlic until soft. Add in asparagus and cook until desired done-ness.  Mix in one container of Philadelphia cooking creme savory garlic and 1/2 a cup of reserved cooking water.  Heat without allowing it to boil, stirring frequently about five minutes or warm and then mix in diced tomatoes.  Serve over pasta and top with shredded basil.

Just to add in, I am by no means being paid by Philadelphia cream cheese, or Kraft, I just was intrigued by the ingredient!

Feb 14, 2011

Red Velvet Chicken Tenders


     First and foremost, HAPPY Valentine's Day to everyone out there in blogland! Second of all, could you ask for a more perfect Valentine? I'm not gonna lie, SA only got this picture because I was holding up a bit of cream cheese mashed potatoes over his head. Our golden Curry is the epitome of love and I just had to share.

     SA and I don't really go all out for Valentine's day, its not our thing.  Now don't get me wrong, we aren't one of those couples that bemoan all aspects of Valentine's, but nor are we ones that go buck wild for the holiday.  We have a system: one year I plan what we do for Valentine's and the next SA plans it all.  This year was SA's and I woke up to:
                                                                clings on the mirror!
                                                              Flowers and an Itunes gift card!
                                             and the best most quirky from my artistic husbands mind:
Yes friends, that is my sink.  Yes that is cinnamon toothpaste spelling out UR LOVED (with hearts). Yes, I adore my darling creative husband and I'm not gonna lie, through the cinnamon haze, I "might" of teared up a little.  He is the best.
     So that being said, how could I not make him something creative and amazing for dinner tonight.  Emphasis on creative. Thus I give to you:


Red Velvet Cake Fried Chicken Tenders
1/2 cups sugar
2 eggs
5 drops of red food coloring
1 teaspoons white vinegar
1 teaspoon vanilla extract
2 1/2 cups flour
1/4 cup baking cocoa
1 teaspoon baking soda
1 teaspoon salt
1 cup buttermilk
1 pound of chicken tenders
Flour for dredging
Canola Oil

Combine all ingredients except chicken tenders, blending until smooth and non lumpy. Heat Frying oil and dredge tenders in flour then dip in red velvet cake batter. Fry six minutes and flip half way.
Serve with cream cheese mashed potatoes.
Now I admit I am a bit embarrassed by this recipe... I mean red velvet cake on a chicken tender? How unhealthy could we get? But I will say, we only had two a piece and no dessert even on Valentines day! (So friends while this recipe might be what is wrong with America, it is all about portion control!)

And SA, just so you know:


Feb 13, 2011

Keeping the Southern Girl Card Biscuits

     Food blogging is a funny thing.  For me reading food blogs is kinda like going to the store on an empty stomach.  I like to sit down and read the new blog posts when I come home from work, but sometimes this can be detrimental to my own cooking plans! Its hard when you read about other peoples successes and look at their drool worthy pictures.  All of a sudden your simple meal is lack luster, or you start obsessing about making something that they made on their blog.  For me it was biscuits.
     Now for most people biscuits aren't a big deal, but for me they are up there with pancakes(highly desirable and one of the few things I absolutely SUCK at making!) I swear I almost lost my Southern Girl Card over not being able to make them, but Rachel over at Bakingtruehappiness (go check her out, her blog is new but her breads rock!~) made some delightful looking biscuits and got me thinking about biscuits. So much so that I had to make them! I researched recipes online until I found the one that I thought would give me what I wanted (tall flaky biscuits) and then decided that I wanted to add buttermilk. The end result was the best biscuits I have ever made and a DEFINITE keeper recipe!
(And yes people, I dorked out and made flower shaped biscuits---in my defense, I was inspired by Rachel's heart shaped ones.)


Keepin the Southern Girl Card Biscuits


3 cups all-purpose flour
3 tablespoons baking powder
3/4 teaspoon cream of tartar
1/2 teaspoon salt
1/2 tablespoon sugar
3/4 cup butter -- let partially freeze and then grate with cheese grater!
1 egg
1/2 cup milk
1/2 cup buttermilk


Directions:
Preheat oven to 425 degrees F. With a knife or pastry cutter cut in, flour, baking powder, cream of tartar,salt, sugar and margarine. Cut in until it becomes course and crumbly. Whip together milk and egg with a fork. Mix with the flour mixture until it forms a soft dough. Add flour if the dough is too sticky. I made a well and stirred it as little as possible. Roll out dough with a rolling pin to about 11/2 to 2 inch thickness. I think mine were about an inch. Next time I am going to push it to the 1.5.
Cut out the biscuits. (I made flowers!) Place biscuits on a cookie sheet.  Bake for 12 to 14 minutes. (mine took 14-15) Remove from oven and let stand for 5 minutes and brush the tops with a bit of melted butter.


p.s. if you have been wondering why I haven't been blogging as much it is because I sprained my wrist and typing pretty much sucked my will to live!

Jan 30, 2011

Will the Real Nutella please stand up?!


     "Reeni from Cinnamon Spice & Everything Nice and Christine of The Cupcake Bandits have created a progressive blogger competition with a monthly winner who will go head to head at the end of the year (December) to secure the position of ULTIMATE DESSERT WARRIOR and win a grand prize package. Each month we will be challenged with a theme ingredient and/or a specific dessert to bake." How could I not join in with this goodness?
     This month we were challenged to use a ingredient I find near and dear to my heart, Nutella.  To be honest I didn't have Nutella until I was 26,when I went to Italy on a holiday.  The friend that I was travelling with and I planned out our entire trip and stayed in many hostels along the way.  Breakfast was usually available in the morning and consisted of some sort of baked good with little packets of Nutella.  I was hooked.  One of the first things I did after I got home was buy a big jar of it and proceed to cover everything in its hazelnutty goodness.  Now, several years later my passion for Nutella has waned a little but I still enjoy it every once and awhile.  The first thing I thought when I read the challenge was think: homemade nutella and finally today I got a chance to make some.... but I didn't just stop there! 
     I got to thinking earlier today that if hazelnuts and chocolate could marry together in such a perfect symphony then how would dark chocolate and almonds? Or what about white chocolate and pecans furthermore...what about other things you can melt...for instance...butterscotch...and cashews.
Yes, my mind was like a runaway carriage, and I decided to enjoy it for the wild ride it was going to be!
I didn't start with homemade nutella, I was too excited about the other blends in my mind. I started with the wildest in my opinion, Cashew and Butterscotch butter...or ButterCash as SA started calling it.
Definitely a taste explosion, it was a creamy mix of golden sweet caramelly cashewy slightly salty goodness that melted on our tongues.

ButterCash
1 cup toasted cashews
4 ounces butterscotch chips, melted
1/2 split vanilla bean
a few drops, vegetable oil (optional)

Add cashews to the bowl of a food processor. Pulse until it becomes a smooth peanut butter-like consistency. Add the melted butterscotch and vanilla. Process until smooth and well-mixed. Add vegetable oil one drop at a time, and pulse to a smooth, spreadable consistency, if necessary.

       Next I spied almonds and couldn't help but think a nice milk chocolate.  It wasn't bad.  Although it was the spread with the least amount of flavor it was still pretty good.  I think next time I try it I will try making it with white chocolate and almonds. 

Milk Chocolate & Toasted Almond Spread
1 cup blanched and toasted almonds
4 ounces milk chocolate, melted
2 tablespoon cocoa
1/2 cup confectioners' sugar
1/2 split vanilla bean
a few drops, vegetable oil
Add almonds to the bowl of a food processor. Pulse until it becomes a smooth peanut butter-like consistency. Add the melted chocolate, cocoa, sugar and vanilla. Process until smooth and well-mixed. Add vegetable oil one drop at a time, and pulse to a smooth, spreadable consistency, if necessary.

     The Hazelnuts were my last prey tonight and I have to admit, now that I have made homemade nutella, I'm not sure that I will go back to the store bought stuff.  The only complaint that I have is the homemade stuff isn't quite as smooth but I think that adds character.  The next time I make it I will process it through the blender once I get everything added together in the food processor.  This was our second favorite of the night and I am super excited to use it to finish my project for the month!

Homemade Hazelnut Chocolate Spread
1 cup shelled, toasted hazelnuts, skins removed
4 ounces bittersweet chocolate, melted
2 tablespoon cocoa
1/2 cup confectioners' sugar
1/2 split vanilla bean
a few drops, vegetable oil (optional)
Add hazelnuts to the bowl of a food processor. Pulse until it becomes a smooth peanut butter-like consistency. Add the melted chocolate, cocoa, sugar and vanilla. Process until smooth and well-mixed. Add vegetable oil one drop at a time, and pulse to a smooth, spreadable consistency, if necessary.


     Clearly, SA and I couldn't eat all these delectable nut butters by ourselves so I did what I had been obsessing over for the past couple of  weeks... Made a NUTELLA TIRAMISU. Yeah, I did that and it was AMAZING! I am submitting this as my January submission to DESSERT WARS and I am crossing my fingers to win this amazing prize packages:

The Most Wonderful List of PRIZES!
-Whisk and cupcake necklace from Moon & Star Designs
-The Smartshopper Electronic Grocery List Organizer
-Beanilla Sampler Pack of Vanilla Beans
-Lenox Personalized Musical Cupcake
-1,000 ideas for Decorating Cupcakes, Cookies & Cakes
-Endless Vanilla and Cinnamon Extract
-Unlimited Layers: A Recipe for Turning Your Passion into Profits
-$50 Gift Certificate to Theme Kitchen
-$50 Coupon Redeemable for Organic Valley Products
-$50 Coupon Redeemable for Organic Prairie Products


Now with out further adieu:


Nutella Tiramisu
adapted from a Giada De Laurentis recipe
6 egg yolks
3 tablespoons sugar
1 pound mascarpone cheese
1 1/2 cups strong espresso, cooled
2 tablespoon hazelnut Kahlua
1/4 cup homemade Nutella
24 packaged ladyfingers
2 tablespoons powdered sugar
1 cup heavy whipping cream

     In a large bowl, using an electric mixer with whisk attachment, beat egg yolks and sugar until thick and pale, about 5 minutes. Add mascarpone cheese and beat until smooth. Add 1 tablespoon of espresso and the nutella and mix until thoroughly combined and transfer to another bowl.
     In a small shallow dish, add remaining espresso and 1 tablespoon of the hazelnut Kahlua. Dip each ladyfinger into espresso mixture for only 5 seconds. Letting the ladyfingers soak too long will cause them to fall apart. Place the soaked ladyfinger on the bottom of a 13 by 9 inch baking dish, breaking them in half if necessary in order to fit the bottom.
Spread evenly 1/2 of the mascarpone/nutella mixture over the ladyfingers. Arrange another layer of soaked ladyfingers and top with remaining mascarpone/nutella mixture.
With an electric hand mixer or stand mixer combine heavy whipping cream, powdered sugar and remaining hazelnut Kahlua. Whip until soft peaks form and spread over top of dessert.
Cover tiramisu with plastic wrap and refrigerate for at least 2 hours, up to 8 hours. Before serving sprinkle with dark chocolate cocoa and chopped hazelnuts.


Special thanks to Reeni and Christine for this special adventure. I loved it and can't wait for more!


Dessert Wars


Jan 27, 2011

Poached Eggs with Creamy Brussels Sprouts


There is something coy about a Brussels sprout:how its tender leaves curl over its crunchy green inside. How many flavors they can take on... I just love them.  Tonight dinner needed to happen and it needed to happen quick! This recipe was amazing! The Brussels sprouts were flavorful and slightly crunchy and the eggs made it even more creamy.  The bacon was the perfect amount of salt and once the yolks were broken and it all mixed together it was AMAZING! I modified this recipe from the Feb/March episode of Fine Cooking.


Poached Eggs with Creamy Brussels Sprouts
4 Slices of toast
2 c. Brussels sprouts trimmed and shredded
4 slices of bacon
2 tbsp. butter
1 large shallot sliced
1 garlic clove diced
1/4 half and half
4 poached eggs
Parmesan for garnishing
salt and pepper

Cook bacon in a skillet over medium heat until crispy, and once cooked pour off all but 1 Tbs.  of the left over oil. Add 1 Tbsp. of butter and the shallot and garlic and cook over medium heat until softened, about two minutes.  Add 1/3 c. water and Brussels sprouts, cream and salt and pepper to taste.  Cover the pan and cook, stirring occasionally until the Brussels sprouts are just tender 5 to 7 minutes.  Put two toast triangles (or flowers!) on each of two plates and top each toast with an egg. Season the eggs lightly with salt and pepper and spoon the Brussels sprout mixture on top.  Sprinkle with the bacon and a few shavings of Parmesan. (Obviously I didn't follow these instructions and instead piled up the sprouts, put the bacon on top and added the egg.)


Well, isn't that fancy?

This months daring bakers challenge was to make a Biscuit Joconde Imprime/Entremet
I honestly I have to say that it is the most challenging dessert I have ever made and yet the most rewarding!  I decided to do a fairly complex pattern and had a bit of trouble with the math for how much I needed of the joconde for my spring form pan (hence the tall skinny entremet), however everything else went quite smoothly and I am thrilled to add skill to my list!


Joconde Sponge

YIELD: Two ½ size sheet pans or a 13” x 18” (33 x 46 cm) jelly roll pan
Ingredients:
¾ cup/ 180 ml/ 3oz/ 85g almond flour/meal - *You can also use hazelnut flour, just omit the butter
½ cup plus 2 tablespoons/ 150 ml/ 2⅔ oz/ 75g confectioners' (icing) sugar
¼ cup/ 60 ml/ 1 oz/ 25g cake flour *See note below
3 large eggs - about 5⅓ oz/ 150g
3 large egg whites - about 3 oz/ 90g
2½ teaspoons/ 12½ ml/ ⅓ oz/ 10g white granulated sugar or superfine (caster) sugar2 tablespoons/ 30 ml/ 1oz /
30g unsalted butter, melted
*Note: How to make cake flour: http://www.joythebaker.com/blog/2009/09/how-to-make-cake-flour/
Directions:

1. In a clean mixing bowl whip the egg whites and white granulated sugar to firm, glossy peeks. Reserve in a separate clean bowl to use later.
2. Sift almond flour, confectioner’s sugar, cake flour. (This can be done into your dirty egg white bowl)
3. On medium speed, add the eggs a little at a time. Mix well after each addition. Mix until smooth and light. (If using a stand mixer use blade attachment. If hand held a whisk attachment is fine, or by hand. )
4. Fold in one third reserved whipped egg whites to almond mixture to lighten the batter. Fold in remaining whipped egg whites. Do not over mix.
5. Fold in melted butter.
6. Reserve batter to be used later.
Patterned Joconde-Décor Paste


YIELD: Two ½ size sheet pans or a 13” x 18” (33 x 46 cm) jelly roll pan

Ingredients
14 tablespoons/ 210ml/ 7oz/ 200g unsalted butter, softened
1½ cups plus1½ tablespoons/ 385ml/ 7oz/ 200g Confectioners' (icing) sugar
7 large egg whites - about 7 oz / 200g
1¾ cup/ 420ml/ 7¾ oz/ 220g cake flour
Food coloring gel, paste or liquid
COCOA Décor Paste Variation: Reduce cake flour to 6 oz / 170g. Add 2 oz/ 60 g cocoa powder. Sift the flour and cocoa powder together before adding to creamed mixture.

Directions:
1. Cream butter and sugar until light and fluffy (use stand mixer with blade, hand held mixer, or by hand)
2. Gradually add egg whites. Beat continuously.
3. Fold in sifted flour.
4. Tint batter with coloring to desired color, if not making cocoa variation.
Preparing the Joconde- How to make the pattern:
1. Spread a thin even layer of décor paste approximately 1/4 inch (5 millimeter) thick onto silicone baking mat with a spatula, or flat knife. Place mat on an upside down baking sheet. The upside down sheet makes spreading easier with no lip from the pan.
2. Pattern the décor paste – Here is where you can be creative. Make horizontal /vertical lines (you can use a knife, spatula, cake/pastry comb). Squiggles with your fingers, zig zags, wood grains. Be creative whatever you have at home to make a design can be used. OR use a piping bag. Pipe letters, or polka dots, or a piped design. If you do not have a piping bag. Fill a ziplock bag and snip off corner for a homemade version of one.
3. Slide the baking sheet with paste into the freezer. Freeze hard. Approx 15 minutes.

4. Remove from freezer. Quickly pour the Joconde batter over the design. Spread evenly to completely cover the pattern of the Décor paste.
5. Bake at 475ºF /250ºC until the joconde bounces back when slightly pressed, approx. 15 minutes. You can bake it as is on the upside down pan. Yes, it is a very quick bake, so watch carefully.
6. Cool. Do not leave too long, or you will have difficulty removing it from mat.
7. Flip cooled cake on to a powdered sugared parchment paper. Remove silpat. Cake should be right side up, and pattern showing! (The powdered sugar helps the cake from sticking when cutting


I filled it with Nutella mousse, ladyfingers soaked in hazelnut kahalua, marscapone fresh whipped cream and topped with dark chocolate covered coffee beans. It was INCREDIBLE!


Blog-checking lines: The January 2011 Daring Bakers’ challenge was hosted by Astheroshe of the blog accro. She chose to challenge everyone to make a Biscuit Joconde Imprime to wrap around an Entremets dessert.


***

Jan 25, 2011

A Baby Shower Menu and Hummus

                                                          Welcome CLARA JOY!
Recently I had the pleasure of helping out with one of my good friends baby shower. In the way of baby showers I would say this one was perfection.  Not too many people, not to few, no chocolate diaper games and great people all assembled in one place to celebrate the upcoming birth of Clara Joy into the world. (And can I just mention right here how much I love that name.  I really do!)
The shower was at two during that weird dead time between lunch and dinner, where most people wouldn't expect a full meal but a snack would be wonderful.
I covered the food, excluding the cupcakes and I have to say I think three people is the perfect way to throw a shower! One person to host the location/decorations, one person to do the food and another to take care of the cake/cupcakes. Much less stress.
I served:
Fruit Salad (Orange segments, grapes, kiwi, strawberries and bananas)
Homemade Salsa


Roasted Garlic hummus and Pita

Spinach Artichoke Dip with spicy crackers
Brie en croute with cranberry compote
Brie en croute with rosemary and garlic
sugar cookies

cucumber water
pink lemonade
and a hot chocolate bar with homemade hot chocolate and the
available additions of
caramel, mini chocolate chips, marshmallows,
whip cream and  butterscotch chips
cheesecake and brownie pops, how fun are these?! They were a huge hit!


Now how could I leave the blog without at least one little recipe?! This recipe is perfect for gatherings because it does not use tahini and I find that tahini is a love it or hate it kind of ingredient.
Roasted Garlic Hummus
2 C. garbanzo beans
1 head roasted garlic
2 Tbsp. Olive oil
1 tsp. Lemon juice
1 tsp. Cumin
1/4 tsp. salt
Combine ingredients in food processor and pulse until completely smooth.  I like to add a little extra cumin at this point and if it is too thick you can add more olive oil or lemon juice depending on your preferences.


Jan 18, 2011

Beef and Cheese Enchilidas


Have I ever mentioned I absolutely hate getting dirt/dough/meatycheesey mixtures under my fingernails? Yep, its true, its up there on my top five things that give me the heebie jeebies right next to feet and being touched by people I don't know(and that my friends is a whole nother story!).  What does that have to do with tonight's recipe? Well, when I make up a batch of enchiladas I like to make two! One for dinner that night and another to freeze sans sauce.  This makes me life easier and more importantly, I only have to touch the meaty cheesy mixture once!
A couple of months ago I stumbled on Debby's recipe over at A Feast for the Eyes and I was THRILLED!  Living in the PacNW there aren't a lot of places that do Tex Mex and being that I am from Texas this was OBVIOUSLY a problem in my book.  The first time I made her recipe I cried a little with joy  was very excited to taste the chili gravy of my childhood again in my own kitchen!  I'm not going to lie, I have made that recipe no less than four times since seeing it and each time I have changed it a little this is the latest version:

TexMex Chili Gravy
1/4 c. Crisco (I know shocking right? But its only 1/4 a cup!)
1/4 c. Flour
1/2 tsp. ground pepper
1/2 tsp. salt
2 large garlic cloves finely chopped
2 tsp. cumin
1/4 tsp. Mexican oregano
1 tbsp. ancho chili powder
1 tbsp. chili powder
2 cups of organic chicken broth

To me the key to this recipe is having all of your ingredients ready. 
First melt your Crisco over low heat and add in flour, stirring until your flour has turned light brown.  Then add in spices and stir until combined.  Add in chicken broth and stir until well combined and cook until thickened (This took about 20 minutes for me.) stirring occasionally.

For the beef and cheese enchiladas I simply prepared some ground beef like I was making it for taco's and stuffed it into warmed corn tortillas with a little bit of cheese, and topped it with the gravy and more cheese and baked it in the oven for 20 minutes on 350.

p.s. In my book you have to have horchata, and guac with your enchiladas!