backgrnd

Oct 16, 2010

chēzˈbûrˌgər so̵̅o̅p

cheese·burg·er (chēzˈbûrˌgər) noun: A hamburger topped with melted cheese.
soup (so̵̅o̅p) noun: A liquid food, with or without solid particles, made by cooking meat, vegetables, fish, etc. in water, milk, or the like
     I have a confession to make:  I don't like soup.  I never have.  It is less than thrilling for me to be served a bowl of soup and I dislike the muddled tastes of most soups most of all, however this year in an effort to be more conservative and push myself to enjoy different things, I am on a mission to find soup recipes that I like.
This definetley fits the bill.  I dont know whether it is because its more chunky than most soups or because it has some of my favorite elements (HELLO CHEESE!!) but I really enjoyed this recipe and will most definetly be adding it to my repotoire of recipes that feed a crowd.


Cheeseburger Soup
1 lb ground beef

1 onion, diced
3/4 cup shredded carrot
3/4 cup chopped celery
1 teaspoon dried parsley
3 cups vegetable broth
4 cups potatoes, cubed
1/4 cup all-purpose flour
2 cups cheddar cheese shredded
1 1/2 cups milk
4 tablespoons butter or 4 tablespoons margarine
ketchup, mustard and sweet pickle relish for garnish.

In a large pot, brown ground beef and onion add broth, celery, carrots, parsley and potatoes. Bring to a boil, and then simmer until potatoes are tender, about 15 minutes. In a saucepan, melt the butter and stir in flour. Add the milk and stir until smooth. Gradually add milk mixture to the soup, stirring constantly. Bring to a boil and reduce heat to simmer. Stir in cheese; continue to stir until cheese is melted. Make sure once you have added the cheese that you do not let it boil. Garnish with ketchup, mustard and sweet pickle relish and serve with crusty bread.

Pop. Six. Squish. Unh-uh. Cicero. Lipschitz. *

I've been really obsessed with making pizza lately and there was only so much time before I decided to make a Chicago style stuffed pizza.  My absolute favorite kind of pizza ever. Not that I have ever been to Chicago, but I have had the delivery! So tonight I decided to try my hand at the double crusted goodness.  This recipe was really good, and making it in my spring form pan was a great idea. It made it super easy to get out of the pan, and I think it will help with not making the crust soggy. I might have went a little overboard on the filling but all in all it was delicious.


Crust:
1 1/2 cups all-purpose flour
1 tsp yeast
6-8 TBS water
4-4.5 TBS
3/4 tsp Kosher salt
3/4  tsp sugar
Proof the yeast, then add to the dry ingredients. Mix and knead for 2 minutes. Coat the dough ball with oil. Let rise for 3-6 hours.
.

Toppings:
1 Package of chopped spinach (Well drained, and by well drained I mean squeezed and drained)
1 c. shredded mozzarella
1/4 c. sliced olives
1 onion sliced and lightly sauteed in olive oil
12 large pepperoni
1/2 c. crumbled cooked Italian sausage
1/4 c. Parmesan


Sauce:
1 large can organic crushed tomatoes
2 cloves of garlic smashed and finely chopped
1/2 tsp salt
1 tsp. agave sweetener
Italian spices to your taste
pepper
crushed red pepper flakes (I went heavy on those)

combine and set to side.

 Preheat the oven to 450° F. Punch down the dough and turn it out onto a work surface. Knead for about 1 minute. Divide the dough into two pieces, about 1/3 and 2/3 of the dough. Roll out the larger piece in a large circle until it is about 3 inches larger than the spring form pan and 1/8 inch thick. Butter the bottom and sides of the pan and  place the dough into the pan and push it into the bottom and sides. The dough should overlap the pan by about 1 inch.  Roll the second piece until it is the same size as the pan. Mix the  cheese and spinach together and place in bottom of pan. Then add a layer of pepperoni and on top of that sauteed onions and olives.  Top with spicy sausage and add another layer of cheese and then tomato sauce.  Lay the second piece of dough on top, then roll  the two edges of the dough together with your fingers to form a thick border. Press down on the filling with your hand, and cut a 1-inch slit in the center of the top crust to allow steam to escape.

* A couple of things in hindsight:
--I wish I would of baked the pizza and then put the sauce on top of the finished pizza.
--I wish I had made this bad boy all vegetables and also made the spinach layer a little less thick.  It was good but I wanted it mixed in more.
--Next time purple onions instead of white and more spice definitely.

All in all it was pretty good I  am going to continue on my search for a super yummy buttery good crust and possibly one that doesn't have to rise so much.

I know, I know weird title if you have never seen Chicago, which I was singing lines from while cooking, photographing and writing this blog!

Oct 8, 2010

How to Make a Green Bean Utterly Unhealthy

SA and I are pretty boring.  We rarely go out during the week, and much prefer to spend our evenings, walking our hotdog bandido, watching movies, or just hanging out.  We do however make exceptions for our friends T and M who literally live around the corner for us.  We like to go over, let our fur babies hang out together in their back yard and a lot of times we eat dinner together, and hang out.  A lot of times it's spontaneous.  This time we were going over to pick up some tomatoes that M grew.  Well, going to pick up tomatoes turned into lets have dinner! Great! Worked for us...except I had already defrosted some meat and also had big plans.
So we decided to have a combined dinner!!! Best of both worlds! T and M were having fried zucchini from the garden and some pork chops on the grill.  SA and I were totally having a junk food night and were having a buffalo chicken pizza complete with Ray's buffalo chicken hot sauce, cheddar cheese and homemade pizza dough.  Oh, and fried green beans with a P.F. Chang's like sauce to go with it.  Crazy menu, I know but in my defense, SA brought home some mutant large green beans from his boss and I wasn't sure what to do with them!
At any rate, we decided to eighty-six the pork chops and had fried zucchini and green beans and buffalo chicken pizza for dinner.  Delish! I wish I had taken pictures of the buffalo chicken pizza, but I am sure that is something that is going to make it into our rotation, however, I will share the fried green beans with sauce!


Tempura Green Beans
1/2 cup flour
1/2 cup cornstarch
1 teaspoon baking soda
1 teaspoon baking powder
1 teaspoon sugar
1/2 teaspoon salt
1 egg
2/3 cup ice water

Sift together the dry ingredients and set aside.
In a medium bowl, beat the egg slightly and mix with the ice water.
Stir in the dry ingredients. Stir only until mixed; mixture will be slightly lumpy.
Honestly, when I got to this point I just dumped the EXTRA LARGE green beans in the bowl and then fried them roughly a minute in some fairly hot vegetable oil, turning once until they were golden brown.


P.F. Chang like- sauce for fried green beans
1 cup  mayonnaise

2 1/2 tablespoons Sriracha hot chili sauce
6 green onions, whites only, coarsely chopped
4 garlic cloves, coarsely chopped
1/2 teaspoon prepared horseradish
Put everything in a blender or a food processor and process till smooth.

Fair warning: this sauce is CRAZY addictive.  I think by the end of the night we were dipping everything in it!!!

Oct 4, 2010

Doorbells and sleigh bells and schnitzel with noodles

I think I'm on an octoberfest kinda kick today...
and yes, I know those aren't egg noodles, but this recipe was so bomb that i just used some noodles we had and called it...delish!


Pork Schnitzel (source: delightfully borrowed and slightly modified from Tyler Florence)
4 boneless pork loin chops (about 5 to 6 ounces each)
1 1/2 cups all-purpose flour
Kosher salt and freshly ground black pepper
2 large eggs
1/4 cup milk
4 cups panko bread crumbs
2 tablespoons extra-virgin olive oil
2 tablespoons butter
1 sprig thyme
Lemon wedges

Begin by placing each chop between 2 sheets of plastic wrap and gently pounding them out with the flat side of a meat tenderizer until they are an even 1/4-inch thick.

Put the flour in a shallow dish and season with salt and pepper. Whisk the eggs and milk in another shallow dish and season with salt and pepper. Put the bread crumbs in a third dish and again season with salt and pepper. Lightly dredge each piece of pork in flour, then in the egg and finally into the bread crumbs, pressing the bread crumbs onto the pork gently so they have a nice even coating.
Lay the breaded pork cutlets in a single layer on a plate lined with parchment and refrigerate, uncovered, for 10 to 12 minutes to allow the coating to dry out a little and adhere to the pork.
Heat oil and butter in large nonstick skillet over medium-high heat. Add the thyme sprig and let it fry for about 1 minute to infuse the oil. Remove the thyme sprig and reserve. Gently lay the cutlets into the pan and cook until golden brown and crispy, about 3 minutes per side. Remove to paper towels to drain. Season with salt and transfer to a serving platter while still hot

germanaustrianslovakian delight

    Last night I decided it was time to go back to my roots so to speak.  I'm sure that it is very unPC of me but I always just lump all of the dishes from Hungary, Germany, Austria and Czechoslovakia together(unless of course we are talking dessert, then I can joyfully name where each tea ring, kolache and dumpling is from). In my mind you have a little stew of some kind, a knoedel of sorts and perhaps if you are feeling daring a lump of sour cream on top and you call it germanaustrianslovakia food.
     Maybe when I get to culinary arts school I will learn something different and my life will be revolutionized.  Maybe not, but for now, my little Czech self is going to claim that last night I went back to my roots...
making Hungarian Goulash.
     Now with this dish I think the SA said it best when I said:
"Is it good? It better be, it's been cooking for the last three hours" and SA said:
"It took three hours to make this?"
and I glared.
Now don't get me wrong all of those three hours were not spent in the kitchen, but STILL. It was a really long time to cook and not feel wildly enthusiastic about the dish. Don't get me wrong, it was still really good and the leftover goulash was delish today so in the end... would I recommend this dish?
Sure it was good. :)


Goulash
3 pounds of stew meat cut into bite size pieces seasoned with salt and cracked pepper
2 large onions sliced thin
olive oil for searing
2TBSP Hungarian  paprika
2 garlic cloves sliced thin
1 TBSP caraway seeds
2 TBSP tomato paste
1 large can of tomato sauce
1/2 c. vegetable stock
kosher salt & pepper to taste
flour for searing meat

In a large dutch oven with a lid add enough olive oil to coat the pan and turn on high heat until oil shimmers but does not smoke. Pat the meat dry and dredge in flour seasoned with kosher salt and cracked pepper. Sear meat for about three to four minutes per side until it has a nice brown. When meat is all seared turn the heat to medium and add a little more olive oil and cook till the onions are tender about three to four minutes. Add the garlic and cook till fragrant thirty seconds more. Add the tomato paste, and paprika and cook for one to two minutes. Then add the tomato sauce, caraway seeds, lemon zest and stock and stir well. Bring to a summer for about fifteen minutes and taste for seasoning, adjusting as necessary. If the sauce is to thick add more stock or water until its the consistency of gravy. Simmer for two hours.

     Now lets talk for a second about these bread dumplings.  The first set I tried to make fell apart in the water it was gross.  Just a scummy top layer of bread and grease. Yuck! I almost was unwilling to try again, but I sucked it up, drained the pot and added a little panko to the dough.

After all... my brotknoedel brings all the boys to the yard!

Brotknoedel or Bread Dumplings
 loaf stale French bread, cut into 1 inch cubes

1 cup milk
2 tablespoons butter
1/2 onion finely chopped
1 tablespoon chopped fresh parsley
2 eggs
1/2 teaspoon salt
1 pinch ground black pepper
1/2 cup dry bread crumbs (I used panko)
2 strips of bacon

.Place the bread cubes into a large bowl. Heat the milk until it starts to bubble at the edges, then pour it over the bread cubes. Stir briefly to coat the bread. Let soak for 15 minutes.

.Meanwhile, melt the butter in a skillet over medium heat. Add the onions; cook and stir until tender. Stir in the parsley, and remove from the heat. Mix into the bowl with the bread along with the eggs, salt and pepper and bacon.
Use your hands, squeezing the dough through your fingers until it is smooth and sticky.
Bring a large pot of lightly salted water to a boil. The water should be at least 3 or 4 inches deep. When the water is boiling, make a test dumpling about the size of a small orange or tangerine, by patting and cupping between wet hands. Gently drop into the boiling water. If it falls apart, the dough is too wet. In this case, stir some bread crumbs into the rest of the dumpling batter.
Form the remaining dough into large dumplings, and carefully drop into the boiling water. Simmer for 20 minutes, then remove to a serving plate with a large slotted spoon. They should come out soft, spongy and delicious!

Oct 2, 2010

Edible Thistles and Other Fun Things

Today was such a great day, not only did I get a new hair color: HELLO brunette/red head! But I got to celebrate one of the cutest kids I knows first birthday(she was very delicate and grabbed small bites instead of mawing into the cake). Tonight for dinner I had some chicken that I had defrosted two days ago so I HAD to cook it today.  It was quickly approaching the point of no return. 
A couple of weeks ago I saw a recipe for chicken breasts stuffed with artichokes and goat cheese, so going into the kitchen I had the kind of  had something like that in mind.  However, once I got into the kitchen and surveyed my ingredients it wasn't gonna happen. No goat cheese, but I DID have some feta. It was on.  In my opinion, stuffed chicken breasts are a pain in the ass.  They take a long time to cook, they are hard to tell if they are done, and meh...lets just face it most of the filling ends up in the pan you cooked it in, thus turning to SAUCE. So, I decided to make chicken breasts with a delicious delicate creamy sauce...NOM!
Chicken Breasts with Artichoke Feta Sauce
14 ounce can artichoke bottoms chopped
1/4 cup crumble  feta cheese
2 skinned, boned chicken breasts
¼ tsp pepper
2 tsp butter
2 Tbs fresh lemon juice
1/4 tsp red pepper flakes
1/2 cup organic vegetable broth


Heat 1 teaspoon butter in a skillet over medium-high heat. Add chicken breasts, and cook 6 minutes on each side or until chicken is done. Remove chicken from skillet. Set aside; keep warm. Scrape the pan and add the vegetable broth, feta and artichoke hearts stirring constantly. Add spices, and lemon juice, stirring until feta is slightly melted and incorporated.

p.s. Taking pictures of tan things is so difficult! Sorry about the ugly pictures!

Oct 1, 2010

Heeeelllllo Gougeres!

     Tonight I was in the mood to try out a new recipe, and I wanted to try something completely different, so I jumped online and it seemed that there was a new group cooking their way through a French cooking cookbook and the first recipe was for gougeres.  Since I don't have the cookbook I wont try and join the cooking group, but the pictures intrigued me: puffy little flaky cheesy bites. Who wouldn't love that?
The recipe was super easy, and I will definitely be earmarking this one for easy entertaining, especially going into the holidays.


Gougeres

slightly modified from:
Mark Bittman's How to Cook Everything

1 c water

4 T (1/2 stick) butter
1/2 t salt
1 1/2 c (about 7 oz) all-purpose flour
3 eggs
1 c  grated Cheddar cheese
1 c grated Parmesan or other hard cheese
1/2 t black pepper
1/4 t chervil

Lightly grease a baking sheet and preheat oven to 425 degrees.
Combine the water, butter, and salt in medium saucepan; turn the heat to medium-high and bring to a boil. Cook, stirring, until the butter melts, just a minute or two longer. Add the flour all at once and cook, stirring constantly, until the dough holds together in a ball, 5 minutes or less.
Add the eggs one at a time, beating hard after each addition (I used my kitchen aid). Stop beating when the mixture is glossy. Stir in the cheeses, black pepper and chervil.
Drop teaspoonfuls onto the baking sheet and bake until light brown, 10-20 minutes.(mine took about 18-22)
I finished the gougeres with a couple of rough chopped tomatoes mixed with a little fresh garlic, balsamic vinegar, salt and rosemary.

Sep 26, 2010

Anniversary Cake

The Sexy Artist and I celebrated our first wedding anniversary on September 12th(it has been a crazy amazing wonderful year and I love him everyday just as much if not more than the day I married him!) and while I would like to report back that it was romantic including cheesy scenes of us feeding each other dried bits of cake lovingly preserved in layers of plastic wrap and foil from our wedding, this was not the case.  The week before our wedding anniversary I unexpectedly had to have my gallbladder removed.  Not only that, somehow I threw away the cake we had saved! I didn't do it on purpose, even though many of you will remember me griping that we should just eat the cake then rather than let it stale for a year.  I think I thought it was one of these weird cuts of pork the SA bought one time when he ventured to the store by himself. (which have subsequently lived in our freezer for the past two years) Needless to say I felt horrible.  Not only were our get-away plans ruined, I had thrown away our cake! There was only one thing left to do.  Recreate the wedding cake. 
Quickly I ruled out two of our flavors, gingerbread with caramelized apples (neither of us are huge fans except in small pieces) and chocolate turtle (while it was delicious its just too rich) So I decided to make a variation of the chai spice cake with white chocolate frosting.
It was a gorgeous cake, delicious frosting and a great way of celebrating our first anniversary.


Chai Cake with Honey Ginger Cream
slightly modified from From Sky High:Irresistible Triple Layer Cakes by Alisa Huntsman and Peter Wynne
1 and 1/3 cups of milk
6 chai tea bags
4 whole eggs
2 egg yolks
2 teaspoons of vanilla extract
2 and 3/4 cups of cake flour
2 cups of sugar
4 and 1/2 teaspoons of baking powder
3/4 teaspoons of ground cinnamon
1/2 teaspoon of ground cardamom
1/2 teaspoon of salt
8 ounces of unsalted butter at room temp.
Preheat the oven to 350 Degrees F. Grease the bottom and sides of the pans and line with parchment paper. Grease the paper as well.
In a small saucepan bring the milk to a simmer over low med-low heat. Add the tea bags, careful not to let the paper tag fall into the milk. Remove from heat and allow the tea to steep for 5 minutes. Remove the teabags and squeeze out the milk. Let the chai milk cool completely.
In a medium bowl mix the eggs, egg yolks, vanilla, and 1/3 cup of the chai milk. Whisk together.
Combine the flour, sugar, baking powder, cinnamon, cardamom, and salt in the bowl of a mixer. Beat on low for 30 seconds. Add the butter and the remaining chai milk, on med-low speed.
Raise the speed to medium and beat until light and fluffy. Add the egg mixture in three additions scraping the between additions. Divide the batter evenly among the pans.
Bake the cakes for 26-28 minutes, or until a cake tester inserted in the middle comes out clean. Allow the cakes to cool in the pans for 10 minutes.Remove cakes from pans and peel off parchment paper. Cool completely.
Ginger Cream
2 and 1/2 cups of confectioners sugar
6 ounces of cream cheese at room temp.
6 tablespoons of unsalted butter at room temp.
1/2 cup of honey (I used blackberry)
1 TBSP. finely minced crystallized ginger
Place all the ingredients in stand mixer and mix till blended.

Crystallized ginger
    Peel and thinly slice 1 pound  fresh ginger root. Place sliced ginger in a heavy saucepan, cover with water and cook gently until tender, about 30 minutes. Drain off water.
    Weigh the cooked ginger and measure an equal amount of sugar and return to saucepan.  Add sugar and three tablespoons of water. Bring to a boil, stirring often, and cook until ginger is transparent and liquid has almost evaporated. Reduce heat and cook, stirring constantly, until almost dry.Toss cooled ginger in sugar to coat. My ginger was really liquid almost the consistency of a caramel, so I poured it onto a cookie sheet and let it cool in the freezer and then broke it into pieces, almost like a ginger brittle.

BBQ Chili

This past week was the beginning of fall, and I am definitely ready for it. I'm ready for pumpkin patches, fireplaces, sweaters and comfort food! Today I thought I would start the season off a little early with one of my go to easy dishes...chili!
I decided to take a little different of a spin on it which was delightful, SA was thrilled with the BBQ-ness of it and I was thrilled at how easy it came together.  I am pretty sure this is going to be my new "feed a crowd" recipe.


BBQ Chili
1 pound ground beef
1 Cans kidney, beans rinsed and drained
1 Cans black beans, rinsed and drained
1 Can white beans
1 Can of Ranch Style Beans
1  onion, chopped
1 1/2 TBS chili powder
1/2 TBS cumin
1 Can diced tomatoes
1/2 c vegetable broth
1 1/2 c. frozen corn
1 c. BBQ sauce

Brown ground beef and drain.
Add remaining ingredients and simmer or  I put it in a crock pot for about 2.5 hours on high.
We topped those off with corn chips from Trader Joe's and a little sour cream.

Sep 22, 2010

Marjory's Period Cookies


When I was a kid, I always thought that Marjory the trash heap was the best character on Fraggle Rock (A close second being Uncle Travelling Mac!). She always seemed so wise, a sage pile of trash knitting her days away always prepared to deliver some bit of guidance to the somewhat lacking common sense Fraggles. She was my kinda gal "all-knowing and all seeing," with a couple magical abilities combined. At any rate, now when anyone mentions a compost pile, I immediately think of Ole Marjory.
Needless to say when I came across a recipe for something called compost cookies I had Marjory on the brain. I was intrigued. I was disgusted and after I read the ingredients, I knew I had to make these bad boys.
Now I won't lie, these cookies have been around the block. (naughty cookies!) I searched them on google and they have been blogged about to ETERNITY and back, so I won't waste a lot of time telling you where they originate from or the other crazy things the chef that created them has come up with I will just tell you the name is all wrong. I'm renaming these cookies. They will forever be known as Marjory's Period Cookies in our house. These cookies are the perfect way to combat period cravings! Salty/sweet/and chocolaty depending on what ingredients you put in them.
Without further adieu
Marjory's Period Cookies:
1 cup butter (that's two sticks, unsalted)
1 cup granulated sugar
3/4 cup light brown sugar
1 Tbsp corn syrup
1 tsp vanilla extract
2 large eggs
1 3/4 cups all purpose flour
2 tsp baking powder
1 tsp baking soda
2 tsp Kosher salt
1 1/2 cups your favorite baking ingredients (options: chocolate chips, Raisenettes, Rollos, Cocoa Krispies)
1 1/2 cups your favorite snack foods (chips, pretzels, etc.)
The first time I made these cookies I used chocolate chips, peanut butter chips, Dylan;s malt balls that I crushed up, Annie's cheddar bunnies, potato chips and tortilla chips.
The second time (yeah, second in two weeks) I used chocolate chips, peanut butter chips potato chips and Annie's cheddar bunnies. What I really want to use is potato chips, cheddar bunnies, chocolate rice krispies, white chocolate chips and some sort of candy coated chocolate.
In a stand mixer with the paddle attachment, cream butter, sugars and corn syrup on medium high for two to three minutes until fluffy and pale yellow in color. Scrape down the sides with a spatula. On a lower speed, add eggs and vanilla to incorporate.Increase mixing speed to medium-high and start a timer for 10 minutes. During this time the sugar granules will fully dissolve, the mixture will become an almost pale white color and your creamed mixture will double in size. When time is up, on a lower speed, add the flour, baking powder, baking soda and salt. Mix 45 - 60 seconds just until your dough comes together and all remnants of dry ingredients have incorporated. Do not walk away from your mixer during this time or you will risk over mixing the dough. Scrape down the sides of the mixing bowl with a spatula.
On the same low speed, add in your favorite baking ingredients and mix for 30 - 45 seconds until they evenly mix into the dough. Add in your favorite snack foods last, paddling again on low speed until they are just incorporated.
Portion cookie dough onto a parchment lined sheet pan. Wrap scooped cookie dough tightly with plastic wrap and refrigerate for a minimum of one hour or up to 1 week.
DO NOT BAKE your cookies from room temperature or they will not hold their shape.
Heat the oven to 400 F,bake 9 to 11 minutes.
At 9 minutes, the cookies should be browned on the edges and just beginning to brown towards the center. Leave the cookies in the oven for the additional minutes if these colors don't match up and your cookies still seem pale and doughy on the surface.
Cool the cookies completely on the sheet pan before transferring.

Aug 29, 2010

Nancy Green Beans

It has been way too long since I blogged and for that I am super lame, however this summer has been hectic in good ways and in not so good, which I would say is just life.
I decided to start off my re dedication to blogging with a recipe in honor of my friend Nancy, who is getting married this next weekend(congratulations Nancy! Hope everything is magical and lovely!:
Nancy Green Beans are the most delicious green beans you have ever had. They are an interesting twist on southern green beans with a couple of surprising ingredients that will leave you salivating for more. I wish I could say that I make them as good as the person that came up with them, but sadly I can never exactly duplicate how good are.
With out further ado:


Nancy's Green Beans
1 lb bacon cut into 1 inch pieces
1 red onion sliced very thin
2 cloves garlic finely chopped
1/4 tsp. black pepper
1/4 c. Balsamic vinegar
1 Tbs sesame oil
salt
1 pound green beans
2 cups chicken broth
* red potatoes cut into quarters
Cut the bacon into one inch pieces and cook in a large pot or dutch oven. When the bacon is about half done and most of the fat has been rendered, add the onion and the garlic. Continue cooking until the onions are wilted and the bacon is done. Add the balsamic vinegar and the green beans and cover with broth. Cover and boil for 15 minutes. Turn down to a gentle simmer and add the sesame oil, and salt and pepper to taste. Let simmer for at least an hour, or until green beans are wilted.

*I have never seen Nancy add the potatoes, however, I am southern, and I love me some potatoes in green beans! Just quarter some new potatoes and add in the last thirty minutes of cooking.

Jul 16, 2010

Summer and comfort food do not normally go hand in hand

This recipe is one that I will set to the side and try again in the fall with a scoop of garlic mashed potatoes or some roasted vegetables. It was delicious, don't get me wrong, but I made it on an almost 90 degree day with only a small window a/c unit to help make our place cool. Consequently, by the time I was ready to sit down to dinner, I was hot sticky and not even in the mood to eat. However, it is delicious, while not seasonally appropriate. I would also file this one under comfort food.
Adapted from a recipe on Cooks.com


Chicken Breasts in Rosemary Brown Butter Sauce
7 Slices of bacon, chopped
1/2 C. Flour
4 Chicken Breasts
1 TBSP. Butter
1/2 TBSP Rosemary
3 Garlic cloves, smashed
1 C. chicken broth
2 Tbsp. Lemon juice
salt and pepper

In a large skillet, fry bcon till crispy and remove with a slotted spoon to drain. As the bacon is cooking, salt and pepper your chicken to taste and dredge through the flour, making sure to get a good coating. Pour off all of left over grease with the exception of around two tablespoons. Add butter to the pan and once it has melted and then subsequent foaming has stopped, add the chicken breasts and cook until browned or it registers 160 on a meat thermometer. Remove chicken and cover to keep warm. Reduce heat to medium and add rosemary and garlic. Cook garlic until slightly browned about a minute or so and then add broth and lemon juice, making sure to scrape all the yummy bits that have accumulated in the pan from the bacon and the chicken. Continue stirring until sauce has slightly thickened and has a slightly glossy look. Return chicken to pan and spoon sauce over.

Jul 12, 2010

I believe in pink

"I believe in pink. I believe that laughing is the best calorie burner. I believe in kissing, kissing a lot. I believe in being strong when everything seems to be going wrong. I believe that happy girls are the prettiest girls. I believe that tomorrow is another day and I believe in miracles." --Audrey Hepburn

I went in search of quotes about the color pink and found this instead and felt it was quite fitting in so many ways. If I let myself I would digress into a diatribe that dissects every sentence of that quote and how its applicable to life at the moment, however I wont bore you with all that. Instead, I will get straight to the food:
Tonight after work I was stressing over several different situations, and there is only one thing I want to do when I am stressing! Cook! This recipe turned out...EPIC. It was like summer exploded in your mouth and then had a spontaneous party with your taste buds. The strawberries melded with the balsamic perfectly and the mushrooms added a meatiness that was nice and filling. SA wasn't a huge fan of the red pepper flakes and I'm sure you could leave them out, but I am a firm believer in a little heat with my sweet. Besides, as I said before, I believe in pink! Pink foods are the best!


Strawberry Risotto with Balsamic Mushroom Reduction

2 Tbsp. Olive Oil
1 C. Arborio Rice
3 C. Chicken Stock
1/2 C. Button Mushrooms sliced
1/4 c. Onion finely chopped
1/4 C. Balsamic Vinegar
1 C. Strawberries chopped
2 TBSP salted butter
1/2 tsp. Red Pepper flake
1/4 C. torn Basil
1/3 c Parmesan Cheese (Please use some quality here, folks, none of the fake stuff in the green container!)
salt


In a large skillet heat one Tbsp of olive oil over medium heat. Add Onions and mushrooms. Saute for about a minute or until the mushrooms start to wilt and the onions begin to get translucent. Stir in Balsamic vinegar and reduce heat to low, stirring often for 15 minutes. Meanwhile, heat chicken stock in a pot on stove on medium heat. Heat one Tbsp olive oil in a pan over medium heat. Add rice into pan and stir for a minute, coating in olive oil. Add the chicken stock, 2 ladles at a time, stirring almost constantly and waiting for the stock to be absorbed before adding more. This process should take 25 to 30 minutes.
Keep the burner just high enough to barely simmer the stock and risotto. You must pay attention, and stir it more than occasionally, but you don't have to be a slave to the stove top.
When the risotto has been cooking for 15 minutes, add cooked mushrooms and onions, making sure to add any liquid that is left in pan. Continue cooking and adding stock, stirring almost constantly, until the rice is tender but still firm. Once it is done, take it off the burner and stir in butter, Parmesan cheese, torn basil, crushed red pepper flakes and strawberries. Salt to taste.

Jul 4, 2010

Happy 4th of July! and Going Country...


Country--
Style Ribs that is!!!
Today was a pretty great day, and the start of what will most definetley be an awesome week. BBQing had to be done today, however, to celebrate the 4th and the only thing I had in the freezer was some country style ribs. I had no idea how to cook those bad boys but I knew I needed to do something to make them tender and to add the the flavor since we have a gas grill, not a charcoal grill, and I have yet to get any cedar planks or woodchips to practice with.

Country Style Ribs
8 pork country style ribs
3-4 Tbsp. Mustard
1 Tbsp. Braggs Amino Acids

Rub:
1/4 C. packed brown sugar
2 tsp. seasoning salt
2 tsp. black pepper
1 1/2 tsp. paprika
1 1/2 tsp. lemon pepper
1 1/2 tsp. garlic powder
1 tsp. onion powder
1/4 tsp. cayenne pepper
1/2 tsp. garlic powder
1/2 tsp. grated orange rind
1/4 tsp. cumin

1.Combine the Rub ingrediants, and smear ribs with mustard and amino acids. Sprinkle 1/2 cup rub mixture evenly over the ribs. Press into mustard and wrap ribs tightly in aluminum foil.
2.Now here you have two options, you can either cook them on the grill on low for 90 minutes or you can do what I did and put them in a 350 degree oven for 90 minutes. Since I was cooking with a gas grill, I really saw no point in wasting gas for that long when it really wasn't necessary.
3.Remove the ribs from foil and sprinkle the remaining rub mixture over the ribs. Place the ribs on the grill over indirect heat. Cover the grill and cook for 10 minutes. Turn the ribs so they are facing meat side up. Cover grill and continue cooking an additional 10 minutes or until ribs are tender.
You should definetley check the ribs before ten minutes because I actually overcooked my ribs a bit, but they had a great taste and the mustard did a lot to make them both flavorful and tender.
I served these with some twicebaked potatoes, and wanted to have some baked beans, but unfortunatley, we were out of beans, or maybe that will be fortunate ;).

Jun 30, 2010

*Hawt* diggity Dog

Tonight, SA is off doing SA type things and I was feeling delightfully lazy after an afternoon spent drinking blended coffee and hanging out by the river. Consequently, I was not in the mood to make anything delicious, nutritious or good for us for dinner, plus I wanted something fast! Hot dogs it was!
OK so I'm coming out with it... Hi, my name is Faith, and I'm a...a...a...HOTDOG snob!(Hi, Faith!)
Yup, I was never one of those kids satisfied with an Oscar Meyer pulled out of the fridge and thrown in the microwave, or even more disgusting an Oscar Meyer pulled out of the fridge and eaten without heating it in some fashion. AND don't even get me started on hot dogs that cost less than a dollar. I know they have to use up the skin, beaks, ears, ahem, weenies, and other unappetizing pieces. Gross. EPIC GROSS.
There are only three acceptable ways to eat a hot dog, one being fried in a cast iron skillet until slightly crisp and thus, delicious, two, broiled in the broiler and three, my most favorite of all, grilled. Mmmm. Being that the fourth of July is approaching at the speed of a northbound train, I thought I would do a little dog schooling on here.
First of all, there is only one brand of hot dogs in my book, the hot dogs that i have been eating since childhood, the best of all hot dogs, the kosherist of all hot dogs, Hebrew Brand National! According to their website, Hebrew Brand has no fillers, no artificial flavors, colors, or the all important by products.
One of my co-workers had told me that I had to try a hot dog wrapped in bacon. Now as I'm sure this blog will end up documenting, I'm a huge bacon fan, however I was equal parts skeeved and intrigued by a bacon wrapped hot dog. I had to try it though, so I prepped my hot dogs, well, actually I prepped one of my hot dogs, because I'm going to be honest, after I wrapped that first dog in bacon, I felt dirty, and slightly seedy. I mean there is something just not OK about hot dogs in the first place, but wrap a piece of bacon around it and I would swear I could hear my arteries crying out in agony: "Noooo!"
So I put the 'dogs on the grill, chatted for a bit with the bestie and then proceeded to fix them up. In my book there is a precise way to make a hot dog and tonight I couldn't make them exactly how I like but I came super close.
Once the 'dogs and the bacon dog (I shudder even writing that) were done, I took them off the grill and surveyed the results. This my friends, is a bacon wrapped hot dog in all its glory:


I'm not even going to comment. There are so many things I could say, but I will leave it. So now I am guessing you want a report on how it tasted? Well here is where it gets super lame, Yup, I tasted it, and I will say that it was interesting..and very greasy. Ugh, so greasy in fact I dropped it, and guess who gobbled it up?
The Great Hot Dog Bandit:

Doesn't he look happy with himself?
He is a sucker for bacon, when we rescued him his former owner told us his favorite snack was bacon, guess they weren't kidding.
At any rate, I still thankfully had regular hot dogs. Now as I said before there is but one way to dress a dog in my book and it goes like this.
1. Toast your bun.

2. Spread a little miracle whip on the bun.

3. Add some sweet pickle relish. The sweet part is key here, people.

4. Then add cheese. mmmm. We are getting somewhere now.

5. Add gently charred hot dog. Now, while we are on this step, lets talk for a moment about darkness of your hot dog. There is a fine line here. The 'dog should be on the verge of blackness, a dark, I've been using too much Hawaiian tropics sun oil shade. Mmmm perfect.

6. Cover hot dog with a generous helping of Wolf Brand Chili, no beans. Revel for a moment in the lovely orangeness of it's coloring, and remind yourself that its ok since your hot dogs were dye free. Mmmmmm.

7. Add a few onions, and dig in!!!


*Author's Note: Quite obiviously, both for its addition of beans and lack of lovely orange hue, this is not Wolf Brand Chili. I am out of the three cans I brought back on my last trip to Texas. (HINT HINT!)

Jun 28, 2010

(E)SCAPE---Meatless Monday(and its a two-fer!)

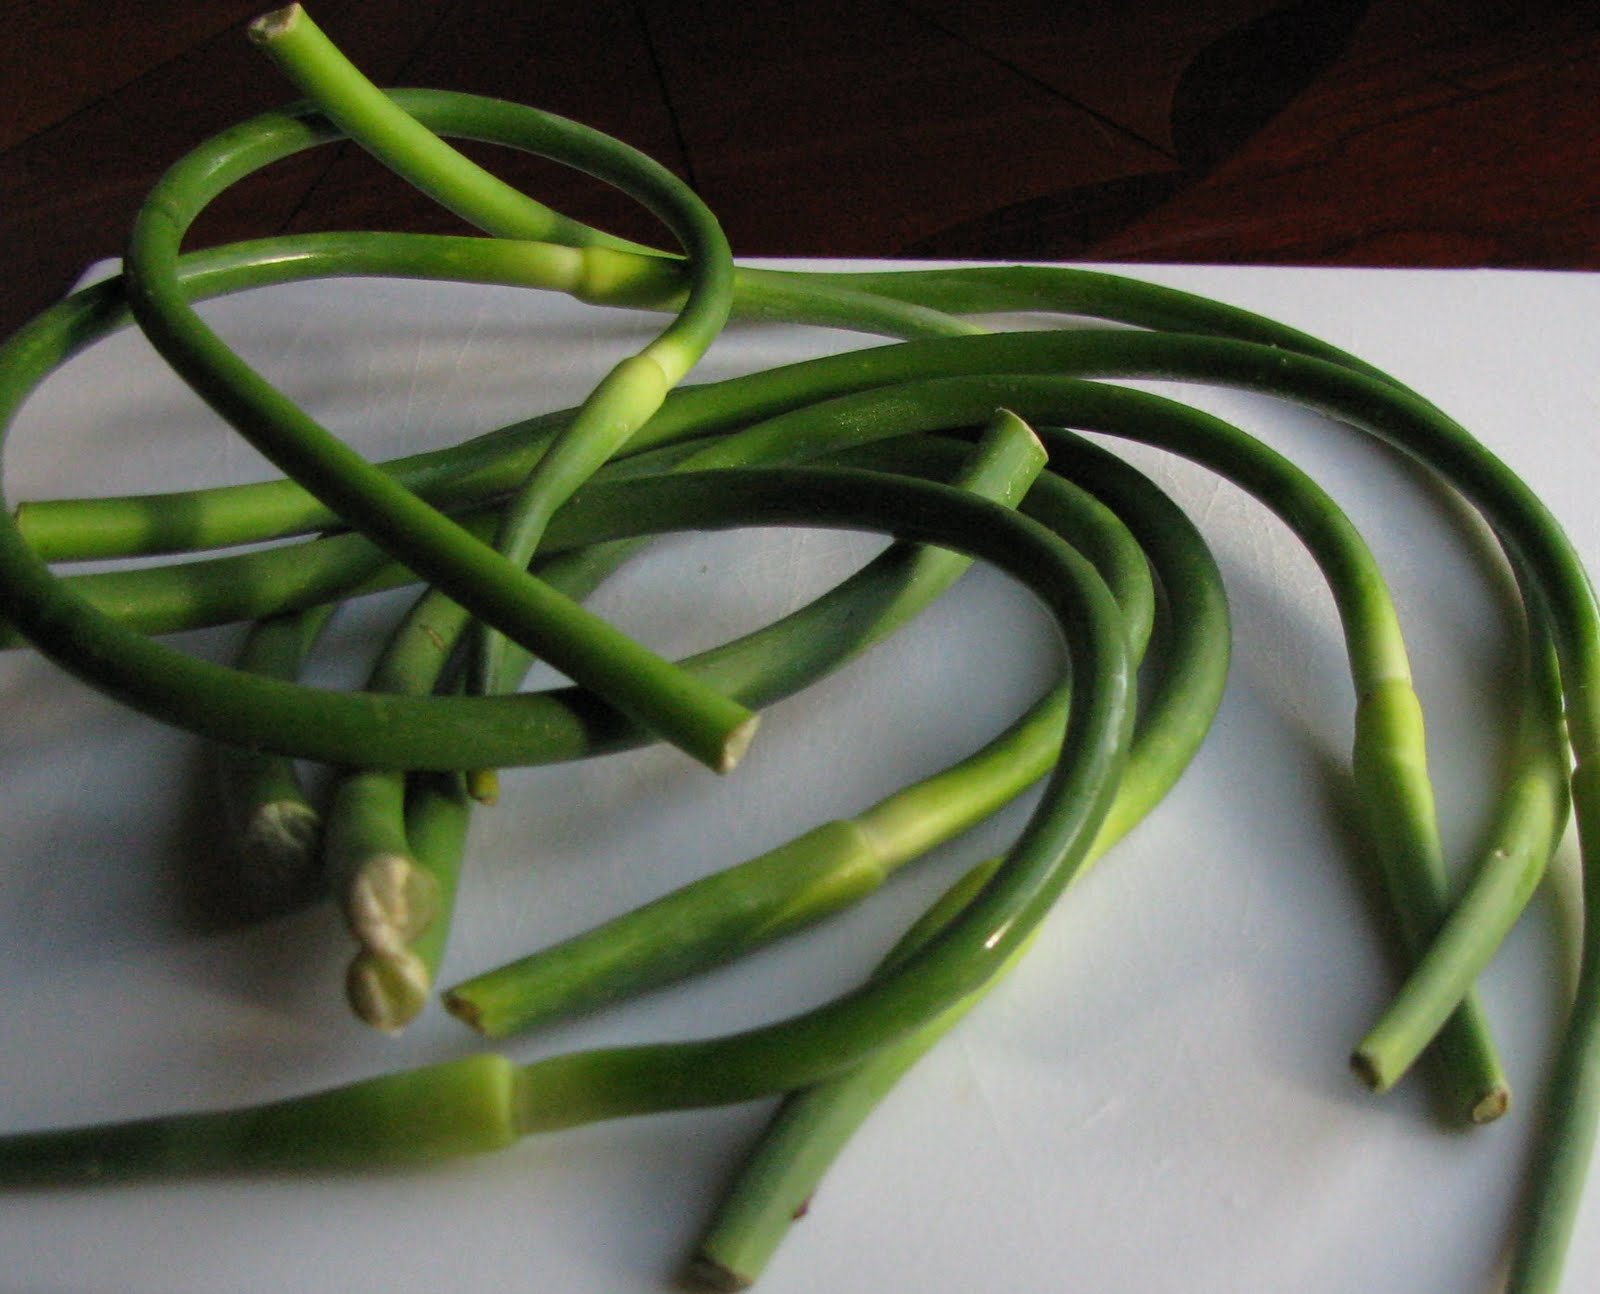
Yesterday, while at Sundance, SA and I perused the vegetables and couldn't pass up one of the beautiful eggplants and some garlic scapes.
what is a garlic scape you ask?
"While many people are aware of the many uses for the garlic bulbs, not as many persons are aware that the stalk of the garlic plant is also edible. Often referred to as the garlic scape, the stalk also contains flavor and can be used in a number of different recipes."
I had read about these bad boys on another blog and in honor of Eclipse coming out this week errrr I mean... since we love all things garlic I wanted to try them, and jumped at the chance to buy some.
The Scape in all its glory:

Aren't they pretty little things?
These scapes were bound for glory... the glory of:


Fresh Pea, Scape, and Lemon Risotto
1/4 c. Onion finely chopped
1/4 tsp. Lemon Rind
1 Tbsp. Olive Oil
1 C. Arborio Rice
3 C. Chicken Stock
1/4 c. Garlic scapes cut on a diagonal
1/3 c. fresh peas (or frozen)
2 TBSP salted butter
1/3 c Parmesan Cheese (Please use some quality here, folks, none of the fake stuff in the green container!)
salt

Heat chicken stock in a pot on stove on medium heat. Heat the olive oil in a pan over medium heat. Add the onion and saute for five or so minutes until the onions are no longer crunchy. Add rice into pan and stir for a minute, coating in olive oil. Add the chicken stock, 2 ladles at a time, stirring almost constantly and waiting for the stock to be absorbed before adding more. This process should take 25 to 30 minutes.
Keep the burner just high enough to barely simmer the stock and risotto. You must pay attention, and stir it more than occasionally, but you don't have to be a slave to the stove top.
When the risotto has been cooking for 15 minutes, add garlic scapes, peas, and lemon zest. Continue cooking and adding stock, stirring almost constantly, until the rice is tender but still firm. Once it is done, take it off the burner and stir in butter and Parmesan cheese. Salt to taste.


Maybe it's just that newly birthed blog high, but I have the urge to also share what we had with the risotto! Remember that beautiful eggplant I got at Sundance? Yeah that baby was calling my name, and I knew just what I wanted to do with it.
Last week a coworker had recommended the Farmers' Market Cookbook presented by Vegetarian Times, so I picked that up this weekend, and boy was I glad I did! It's absolutely chocked full on awesome vegetarian recipes with seasonal ingredients, stuff that I'm practically drooling to make and fits quite nicely into our three meatless meals a week plan. One recipe that really stood out to me, though was:


Seared Baby Eggplant with Mozzarella and Basil Oil
adapted from Vegetarian Times, Farmers' Market Cookbook

Basil Oil:
1 c. tightly packed Basil leaves
1/4 c good quality olive oil

Eggplant:
1 Large Eggplant sliced into 1/2 inch rounds
2 TBS. Olive Oil
2 TBS. Balsamic Vinegar
1 6oz ball of mozzarella, sliced
salt and pepper

1. To make Basil oil, Blanch basil 5 seconds in pot of boiling, salted water. Drain; plunge into ice water, pat dry and puree in blender with olive oil. Set aside.

2. To make Eggplant: Place in colander and sprinkle with salt. Let stand for 45 minutes. Rinse, pat dry.

3. Heat oil in skillet over medium heat. Add eggplant and cook five minutes or until browned, using a spatula to move slices often to prevent sticking. Flip eggplant and add Balsamic vinegar, reduce heat to medium low and cover. Cook 5 to 7 minutes more or until vinegar has evaporated, and second side of eggplant is brown.

4. To serve, place mozzarella slices on serving plates. Top each cheese slice with eggplant and basil oil. Salt and Pepper if desired.


SA and I really really enjoyed the eggplant and risotto. The garlic scapes are definitely something that I will want to get again, as they tasted completely different then I expected. I bit into one of the raw scapes and it had a very strong taste that was between raw garlic and onion, however once cooked in the risotto they were quite mild, and delightfully crunchy, almost like asparagus. The eggplant was delicious and I think that it will translate to a great summer appetizer. It reminded me of a caprese salad, and I actually preferred it to the normal tomato caprese. (But ask me again in a couple of weeks when tomatoes are in season which I prefer :))


PWC(Playing While cooking): Vampire Weekend, Contra

Jun 27, 2010

Any Perfect Sunday

Today was an amazing day! The sun was shining and it was actually over 80 degrees, which seems to be a rare and splendid surprise for this neck of the woods! The sexy artist(SA)(aka my husband!) and I had a driving adventure and even checked out one of the "health food" stores in the neighborhood. I would strongly recommend Sundance foods to anyone in the greater Eugene area! We bought a new product we are excited to try out, and I will blog about it when I do!!! We also picked up some garlic scape's, a BEAUTIFUL eggplant and a new beeswax candle, which I am pretty much convinced smells like heaven. We took a great detour and let Curry (the eighty pound golden retriever) play in the McKenzie river, and once we got home were both kind of tired and hot, yet dinner HAD to be made!!!
*Fair warning* This will probably be the LAMEST blog post EVER because I took no pictures, but cut me some slack... I hadn't even decided to make a cooking blog at that point!
So I had some organic ground beef that I had been wanting to use and quickly decided to make hamburgers. And what is better than STUFFED BURGERS!!!!

Stuffed Burgers (this makes two good size patties!)
1/2 pound of quality ground beef
2 slices of bacon chopped and fried until very crispy
2 TBSP onion finely chopped
1 garlic clove, smashed and finely chopped
cheese finely grated (We used tilamook GARLIC CHEDDAR because it is the bomb, and one can never have enough garlic in their life!)
1 Tbsp of Worcestershire sauce
1 tsp of grill seasoning (we used the grill mates garlic burger seasoning) (are we sending a garlic trend here?)

1. Mix together the Worcestershire sauce, grill seasoning and meat.

2. In a bowl mix the other ingredients (onion, bacon, garlic and cheese)

3. Divide your meat into four same size patties and flatten.Once you have the stuffing ready, place it in the center of one patty. Spread it out, leaving plenty of room all around the edges. Place the second patty on top and press the edges together. Make sure that you have a good solid patty that isn't too thick, or it will never cook on the grill!

4. Grill it up!!! Be sure to be careful, or you will end up like me with a blob of cheese that needs to be cleaned off her grill!

We decided that these burgers didn't really need buns, but just some sauce on the side. I used mayo because I love it so and SA covered his in some of the Jack Daniels BBQ Sauce.

Since both of us were being lazy and didn't want to heat the kitchen up as much as possible we decided to try a new recipe I saw on one of the other blogs I follow, Angel in the Kitchen.
It was delicious and I would HIGHLY recommend it. But be careful and make sure you soak your corn a full twenty minutes, or you WILL catch it on fire :)
Also we added crushed peppercorns and left of the Parmesan since our burgers were so cheese heavy ;) Moderation, RIGHT?!

Grilled Corn with Garlic Butter and Parmesan(modified from angelinthekitchen.blogspot.com)
Makes 8 servings

8 ears sweet corn, husks on
1/3 c. butter
1 clove garlic, minced
1/4 tsp. salt
1/4 c. grated Parmesan cheese
1/4 tsp. cracked peppercorn

1. Soak corn in cold water for 20 minutes. This is a crucial step toward not turning your corn into a burnt pile.

2. In a small saucepan, combine butter, garlic, and salt. Cook and stir over medium heat until butter is melted. Set aside 2 Tbsp.

3. Peel back corn husks to within 1" of the bottom. Remove the silk.

4. Brush with the garlic butter.

5. Re wrap the corn in the husks, and secure the husks with kitchen twine.(we didn't do this part but it probably would of made it easier)

6.Grill corn, covered, over medium heat for about 25 minutes, turning occasionally.

7. Cut the strings and peel back or remove the husks. Drizzle with the reserved butter, and sprinkle with Parmesan.

So how is that for a first post?! Since I didn't take any pics of the actual food we ate tonight, I will try and leave a pic...


These are some of the "perfect peas" SA harvested from the garden tonight... tomorrow they will become a masterpiece :)